Hosting static content with Nginx - Basic setup
Luke Kumar-Jan 03, 2024
The following are some basic notes about setting up an Nginx server on a Debian system to serve static content. This isn't a comprehensive tutorial; it's more of an accompaniment to other tutorials, which are accurate but can be lacking in readability to non-experts.
For a full tutorial on an Nginx setup with Debian, please see: https://www.linode.com/docs/guides/how-to-install-nginx-debian-10/ (it's on the Linode site, but applicable to any server running Debian).
Confusing concepts for beginners
The term server can have a few meanings; servers are computers whose purpose is to host content and "serve" it (pass it on) to other computers upon request. There are computers built for the sole purpose of being servers, but really any computer can act as a server.
But server can also also refer to software used to manage the traffic coming in to the machine. Nginx, Apache, Express, and Django are examples of software that acts to route incoming/outgoing web traffic. Nginx and Apache are two of the most popular Linux-based servers frameworks, and are widely used; Express is the most popular server framework used by Javascript developers. The more you read and work with these concepts, the clearer it will become.
Intro
Nginx is a popular web server; it's able to handle a high volume of simultaneous requests. Broadly speaking, It boasts asynchronous, event-driven architecture, as opposed to the multi-threaded request handling of Apache (that's the extent of my understanding... note to self, learn more about blocking operations)
It's especially well-suited to serving static content. I originally deployed this site as static files hosted with Nginx, before adding some additional NextJS features and moving to Vercel. But I was very happy with its performance on my modest shared Linode server.
It's also commonly used as a reverse proxy to connect server software running locally on a machine to the outside world - for example, this site's API server runs express on port 5000, and uses Nginx to relay traffic between the local express server and the rest of the web.
reverse proxy diagram:

This article details setting up an Nginx server as the "main server" (not proxy) to host your content.
Nginx server hosting static content:
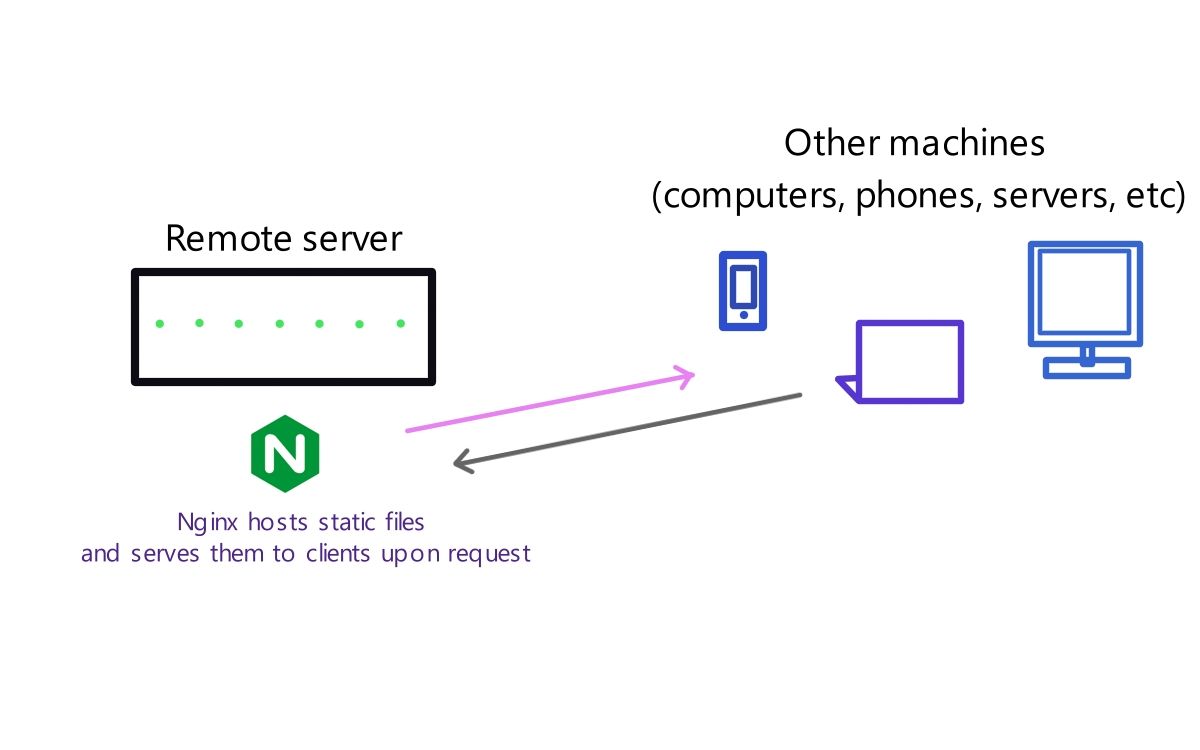
So, here are some notes on setting up a static site with Nginx, specifically on a Debian system.
Before you begin
-Set up a cloud instance running Debian; SSH into your instance. If you're running a Linode, in the dashboard for your instance you'll see a column, "Access," with code to paste into your terminal to connect with your cloud machine.
1. Install Nginx on your system
Once you've connected to your instance, run these commands:
sudo apt update
sudo apt install nginx
2. Setting up your site config file
I found the documentation/tutorials confusing for this; there are two folders where it's possible to set up your server's configuration file:
=> /etc/nginx/conf.d => /etc/nginx/sites-available
I don't know why there are two options, and why some people recommend one or the other, but I went with a tutorial recommending the second. In /etc/nginx/sites-available, create a file with your sites name, eg:
touch mysite.io
then, edit the file with vim (or nano):
sudo vim mysite.io
Add a basic configuration for your server block:
server {
    listen 80;
    listen [::]:80;
    server_name  mysite.io;

    root /var/www/mysite.io
    index index.html;

    location / {
        try_files $uri $uri/ =404;
    }
}
This tells nginx to listen on port 80, for requests to our site, mysite.io; when requests are made here, nginx must look in the folder, /var/www/mysite.io, for the index.html file, and serve it to the client.
We need to create a symlink between the sites-available folder where we created this server block, and the sites-enabled folder:
sudo ln -s /etc/nginx/sites-available/mysite.io /etc/nginx/sites-enabled/
This will copy your file to the sites-enabled folder, and any changes that you make in the future to sites-available/mysite.io will be applied to sites-enabled/mysite.io
3. Add your site's html In /var/www/ , create a folder for your site:
mkdir mysite.io
Within this folder, for now, just create a basic index.html file:
<h1>Hello Murl</h1>
This is the location that we told Nginx to look in when it gets requests on port 80 for our domain.
4. Reload and test Test your Nginx configuration:
sudo nginx -t
Then, reload the server:
sudo nginx -s reload
Now, when you type your server's IP address in the browser, you should get this site. The next steps are configuring your DNS, and obtaining an SSL certificate to serve your site over HTTPS (Certbot is a good option). For more details, I recommend the tutorial that I linked to at the top of this page.
Good to know
Uploading files
You can use the secure copy command for copying your folder of static assets from your local machine to your server:
scp -r <path-to-folder-on-local-machine>\* root@<your-server-ip>:/var/www/<your-site-name>
You'll be prompted to enter your password; you can also use an SSH key for this process.
Security
Your server will need a firewall; many cloud computing providers such as Akamai and Amazon have their own firewalls you can use; alternatively, you can install uncomplicated firewall (ufw) on your instance and use that.